Openclaw introduction
I am a software developer who is passionate about creating innovative and efficient solutions to complex problems. I also enjoy writing about my personal projects and sharing my knowledge with others. I am maintaining a blog to document my coding adventures, share tips and tricks for software development, and discuss interesting topics in computer science.
Setting Up OpenClaw on a Self-Hosted Server
I've been experimenting with OpenClaw for a few weeks, and I'm excited about what it can do for me. OpenClaw is an open-source AI-agent framework that lets agents interact with tools and skills while I chat with them on channels like Telegram or Discord. The best part is that it can act as a personal assistant, handling day-to-day activities.
In this post, I will go over how I set up OpenClaw on a Linux VM, connected it to Telegram, and gave it access to Google services like Calendar, Gmail, and Tasks. Since OpenClaw by itself comes with a few security risks, it is best to have an architecture whereby the AI agent does not get too much information/data about my credentials that I provide. The goal is to create an AI agent that can interact with my tools and accounts without exposing my main credentials.
Installing OpenClaw
First, follow the official installation guide:
https://docs.openclaw.ai/start/getting-started
For my setup:
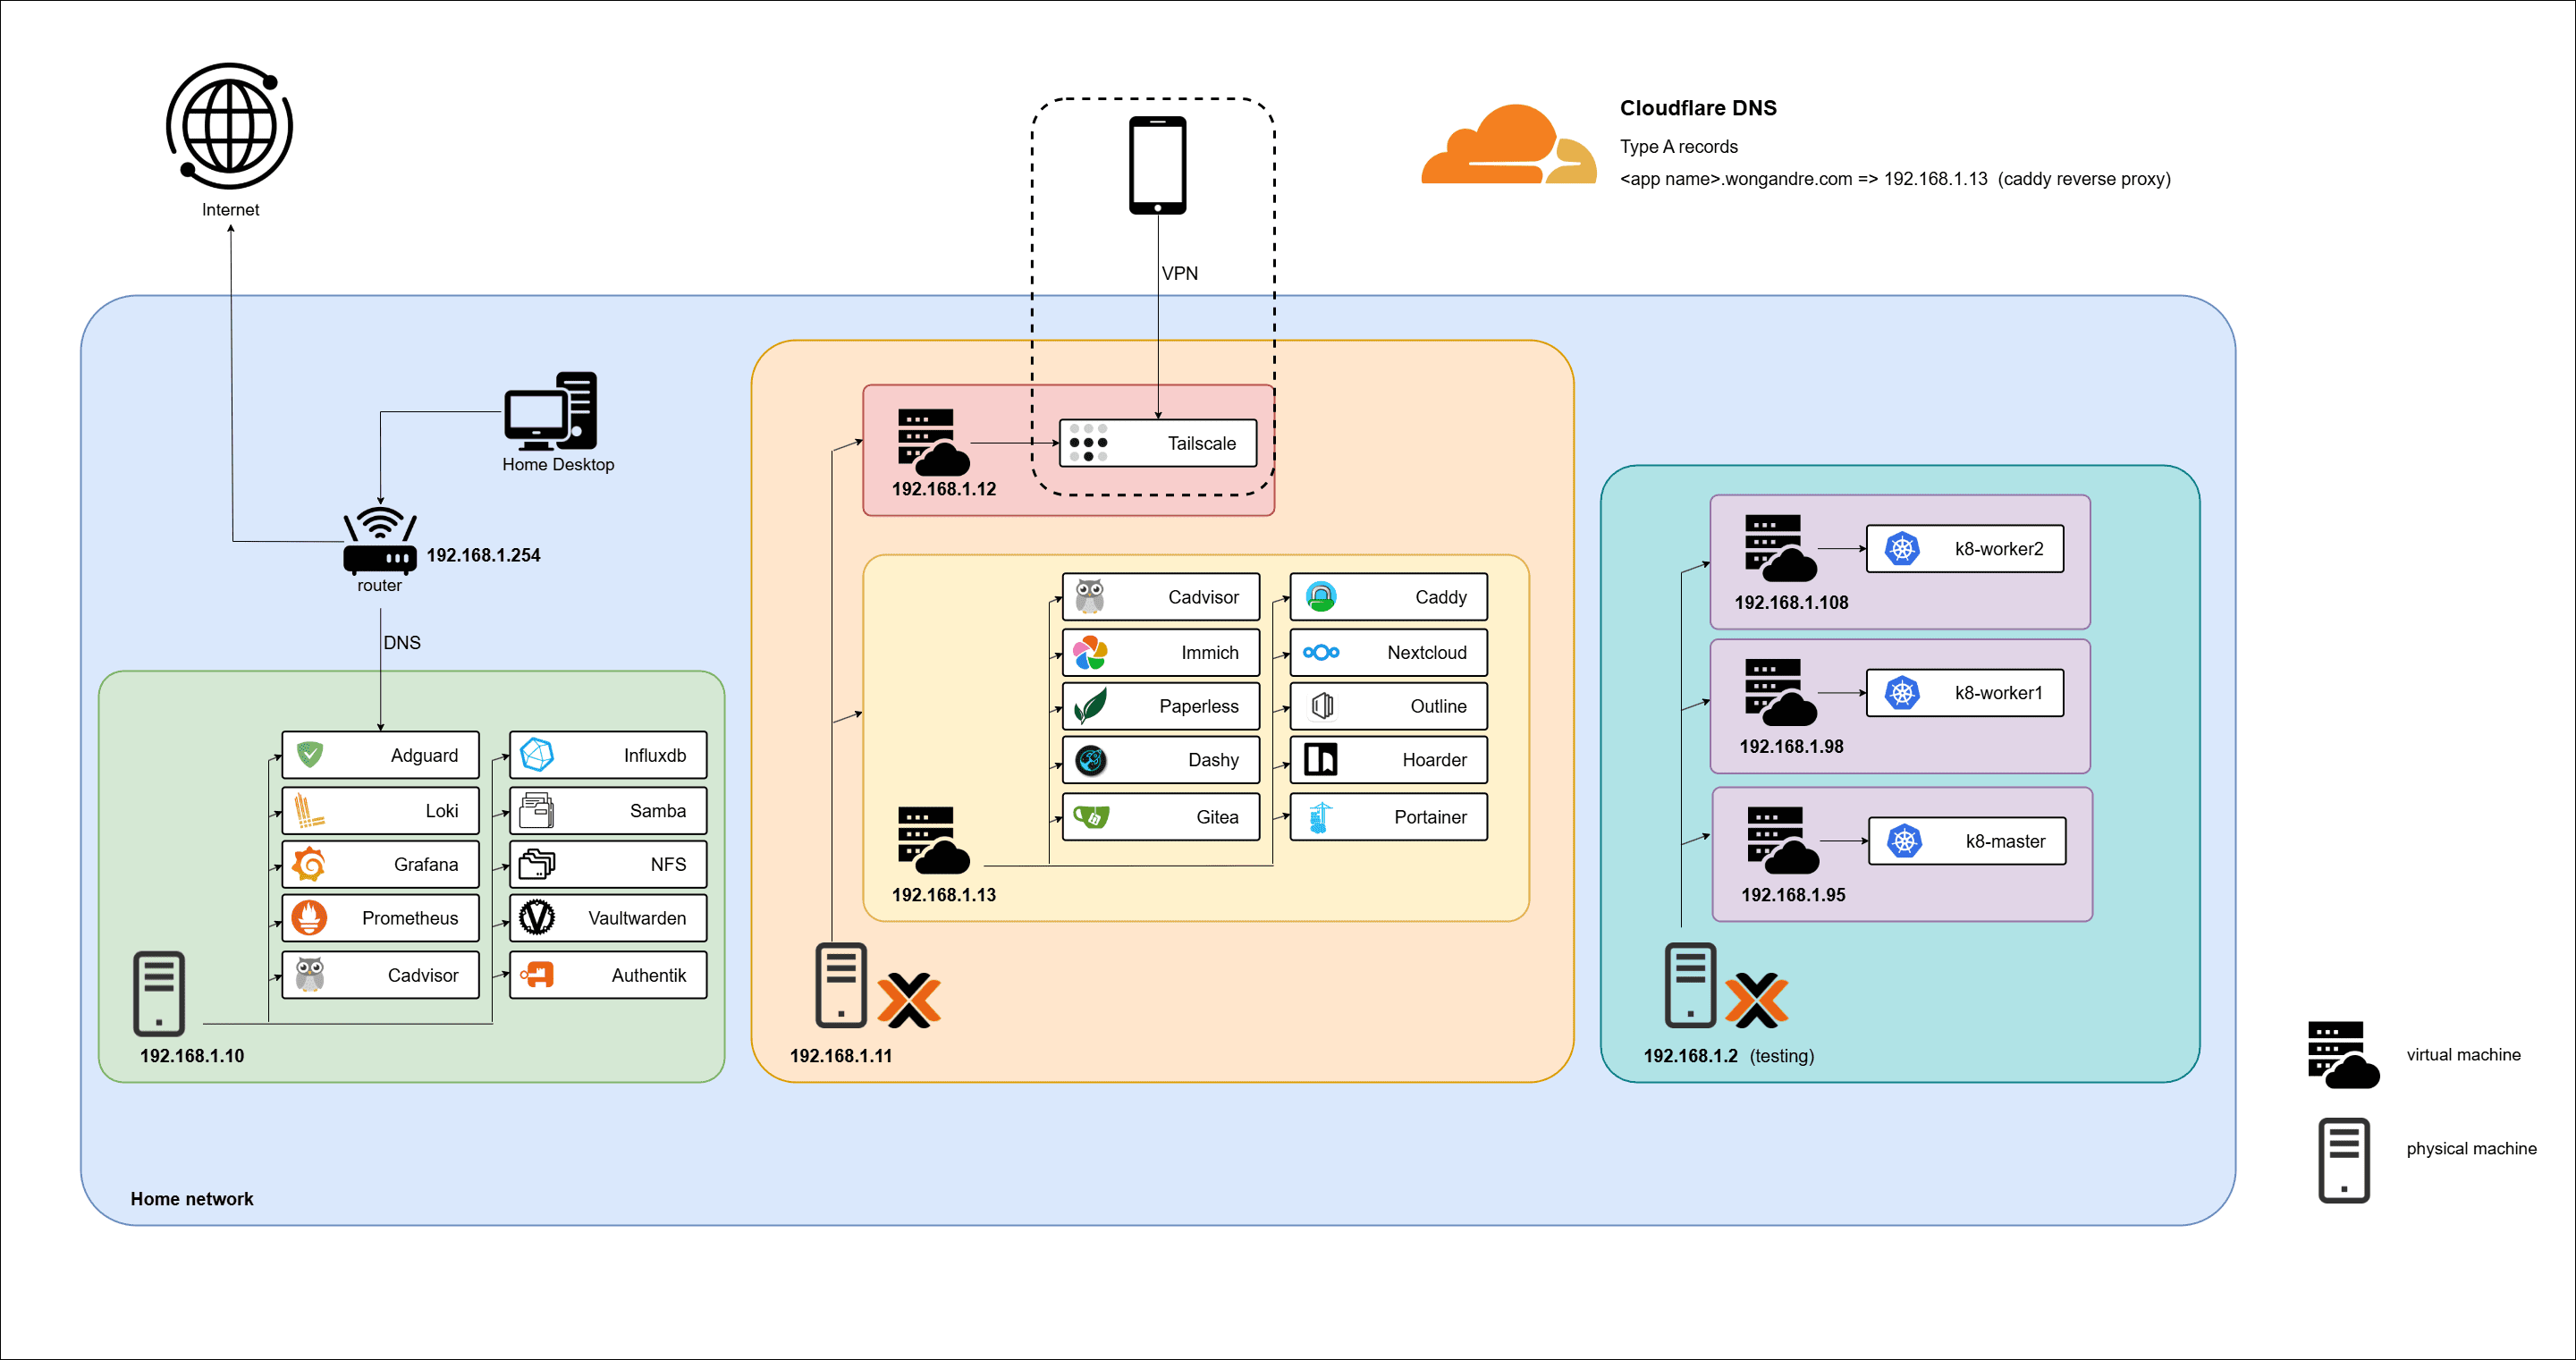
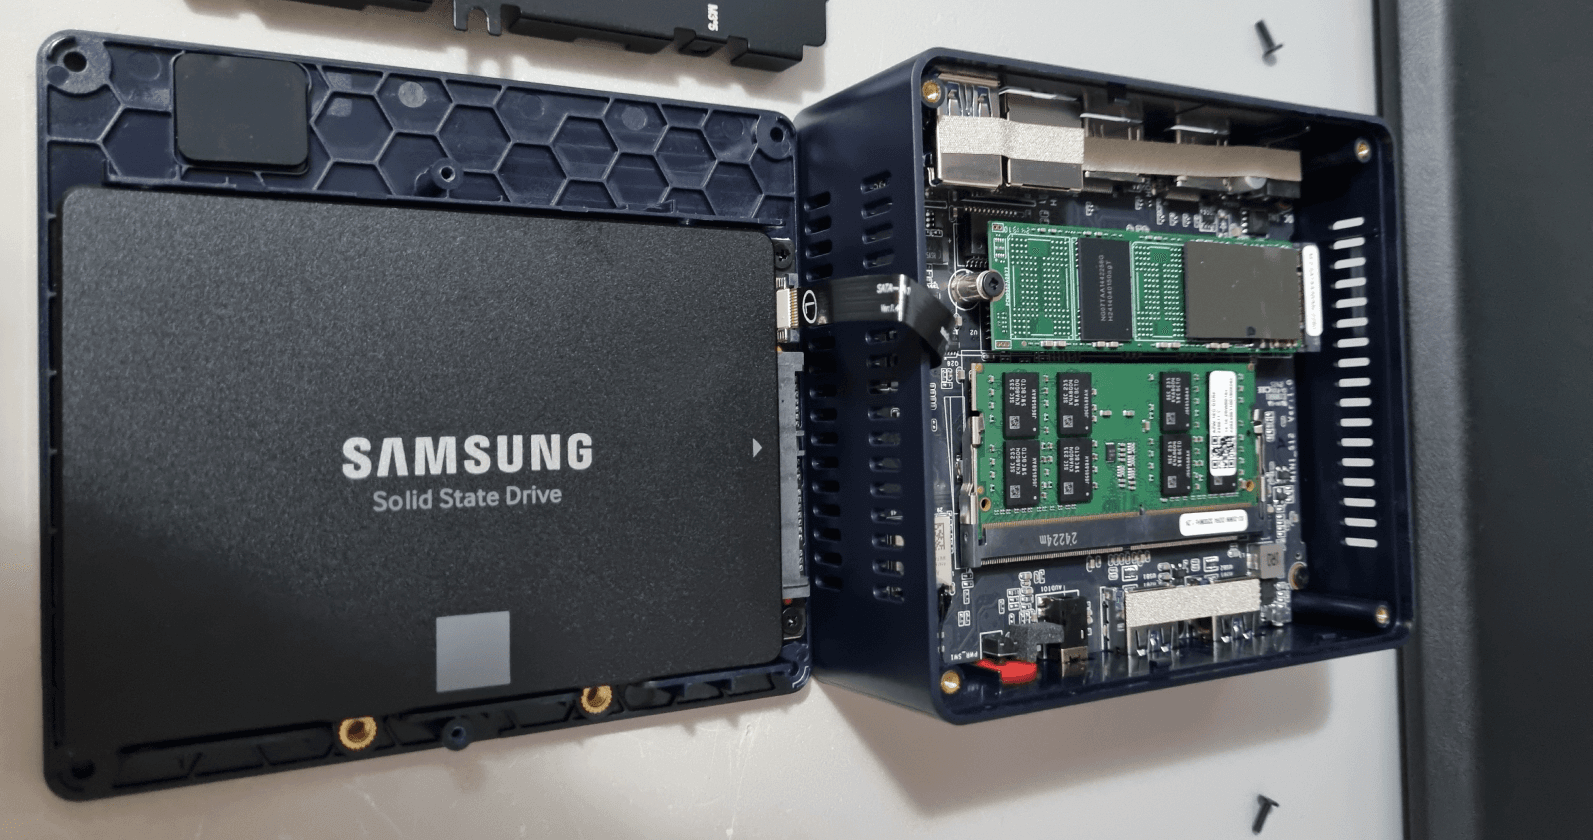
Created a Proxmox virtual machine and installed Ubuntu Server (ubuntu-22.04.5-live-server-amd64.iso) on it
I am using
gpt-3.5-codex-mediumas my LLM model, because I have one month free subscription for OpenAI's Plus plan. This gives me an ample amount of credits to use for OpenClaw.I added a Telegram channel for OpenClaw, the main area where I will be chatting with it. This can be created using the BotFather bot and calling
/newbot. After creating it, it will provide you a token as shown below, where you can input it during the OpenClaw setup. The first chat will probably be blocked by the gateway. Run the following command to authorize the channel:
 openclaw pairing approve telegram ABCDEFG
Once installed, you should be able to start the OpenClaw agent and interact with it through the CLI or Telegram. The first time it's being run, it will ask questions about you and itself, where you can provide information about yourself.
After interacting with the AI agent. It will write itself into AGENTS.md, MEMORY.md, SOUL.md, USER.md, so that next time when it runs on a new session again, it can be loaded back in the context and will seem as though it remembers things about you. You can also manually edit these files to your liking as well.
Configuring Git for the Agent
Some OpenClaw workflows require Git access (for example, committing code changes or interacting with repositories).
Configure the Git identity used by the agent:
git config --global user.name "name"
git config --global user.email "name@gmail.com"
This ensures that any commits created by the agent are properly attributed.
Giving OpenClaw Access to Google Services
One of the more interesting things I wanted the agent to do was interact with:
Gmail
Google Calendar
Google Tasks
Instead of exposing my personal Google account, I created a separate Gmail account dedicated to OpenClaw. It is free to execute things on its own Google account without having authorization to my personal Google account. This helps further reduce risk, and I will not be surprised to find out one day that all my emails were deleted by AI.
I will be installing the gog skill on Clawdhub.ai. OpenClaw allows you to extend the agent by creating skills. This skill allows me to connect to Gmail, Calendar, Drive and others. It requires the gogcli and oauth to be set up first.
Installing gog skill
Create the skill directory:
mkdir -p .openclaw/skills/gog
Then create the skill definition file:
vim .openclaw/skills/gog/SKILL.md
This file tells OpenClaw how to use the tool. Means the AI will read this skill, understand it and then execute tools such as gogcli. SKILL.md can be directly copied from the clawhub website here
Installing gogcli
https://github.com/steipete/gogcli
Download the binary:
wget https://github.com/steipete/gogcli/releases/download/v0.11.0/gogcli_0.11.0_linux_amd64.tar.gz
Extract it:
tar -xzf gogcli_0.11.0_linux_amd64.tar.gz
Move the binary into your path:
sudo mv gog /usr/local/bin/
Verify the installation:
gog --help
Creating Google OAuth Credentials
To allow gogcli to access Google services, we need to create OAuth credentials.
Open the Google Cloud Console credentials page:
https://console.cloud.google.com/apis/credentials
Then follow these steps:
Create a new project
Enable APIs
Gmail API
Calendar API
Tasks API
Configure the OAuth consent screen
Add your Gmail account as a test user
Create an OAuth client
Download the credentials file:
client_secret_....apps.googleusercontent.com.json
Authenticating gogcli
Once you have the OAuth credentials, store them using:
gog auth credentials ./client_secret_.apps.googleusercontent.com.json
Then authorize your Google account:
gog auth add name@gmail.com --services user --manual
You will be prompted for a keyring password. For simplicity, I used openclaw.
In SKILL.md, update the instructions so the agent knows how to run the tool properly. Running the tool in Linux requires the GOG_KEYRING_PASSWORD environment variable.
Notes

- Set `GOG_ACCOUNT=name@gmail.com` to avoid repeating `--account`.
- Always set `GOG_KEYRING_PASSWORD=openclaw`.
- Always add `--no-input` when executing commands.
What the Agent Can Do Now
After completing the setup, the OpenClaw agent can now:
Read my Google Calendar
Check emails
View tasks
I then subscribed to the calendar of my main Google account. After giving my permission to read and write, I can tell my AI agent to add a schedule for plans and then every night, notify me of all the things I have in my calendar for tomorrow.


Here are the things we have done for now:

more t