Installing proxmox on a old server desktop
I am a software developer who is passionate about creating innovative and efficient solutions to complex problems. I also enjoy writing about my personal projects and sharing my knowledge with others. I am maintaining a blog to document my coding adventures, share tips and tricks for software development, and discuss interesting topics in computer science.
Background
Recently I got my hands on an old server desktop. I plan to repurpose it into a home lab to host some internal applications to be used at home and also host some of my side projects which can be externally accessed by the public. I have decided to try installing Proxmox on the desktop.
Proxmox is an open-source virtualization management platform that can provide both Kernel-based Virtual machines (KVM) and also container-based virtualization with Linux Containers (LXC). It also provides a nifty web-based interface for the user to interact with Proxmox.
Hardware specs
Here is some hardware information about my old server desktop:
Precision Tower 5810
Intel Xeon E5-1607 v3
Nvidia Quadro K2200
8GB of ram
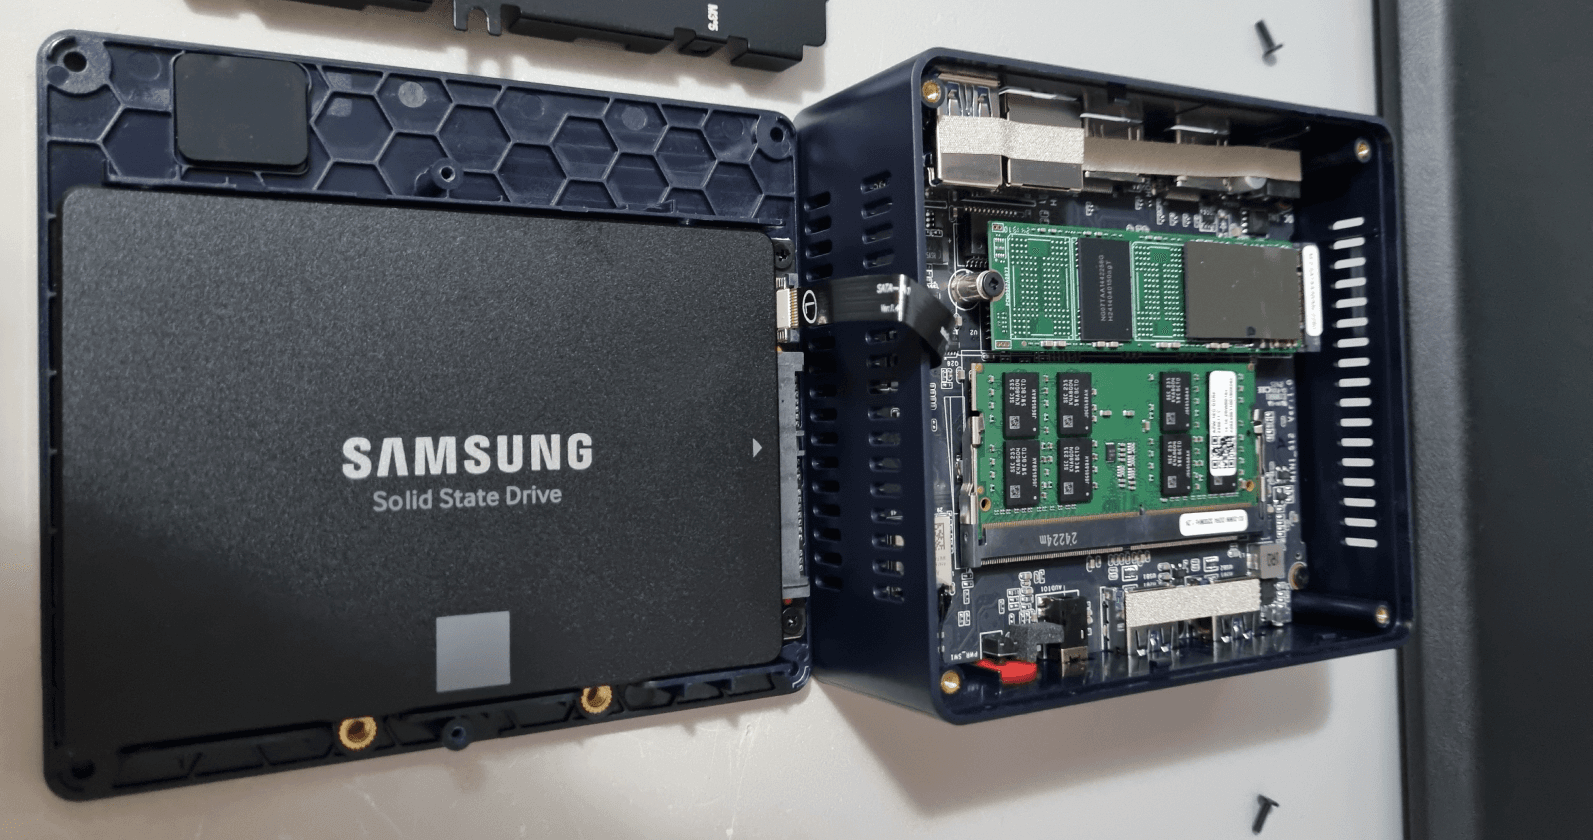
256GB Samsung SSD
500GB Hard disk drive
It's a pretty old desktop, released in 2014 and I managed to get all its components for free. Next, we can try to wipe everything in the disk drives and install Proxmox.
Installing Proxmox
The Proxmox VE (Virtual Environment) can be downloaded for free from the official Proxmox website. The version I am using is
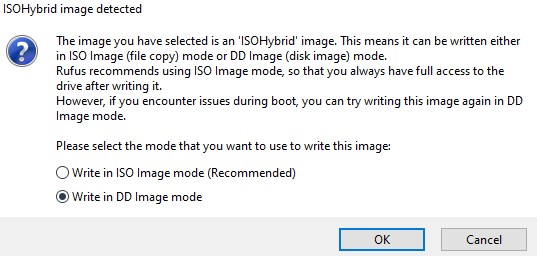
proxmox-ve_7.3-1.iso.Create a bootable installation media from a USB drive. Here I used Rufus to write the Proxmox ISO image.
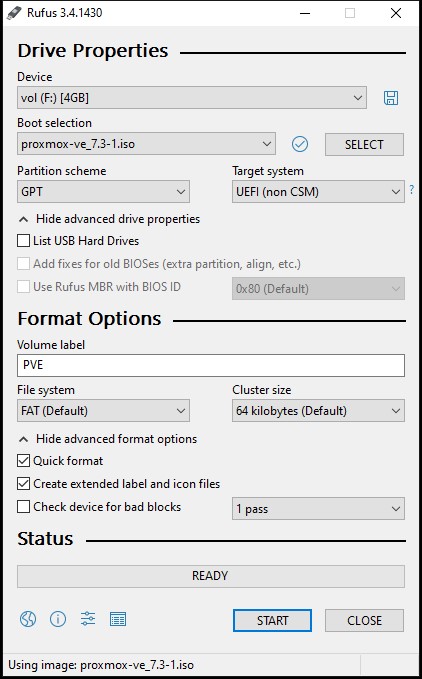
For Rufus, remember to write in DD Image or else it would not work.
Insert the USB drive into the desktop and boot from the USB drive.
remember to disable secure boot on the BIOS of certain Desktop
you might need to enter the BIOS to change the boot order so that the USB drive can be booted first
Follow the installation guide shown on the desktop
Select install proxmox ve
Accept End User License Agreement
Select which disk to be used for installing Proxmox
Select password, language and keyboard layout
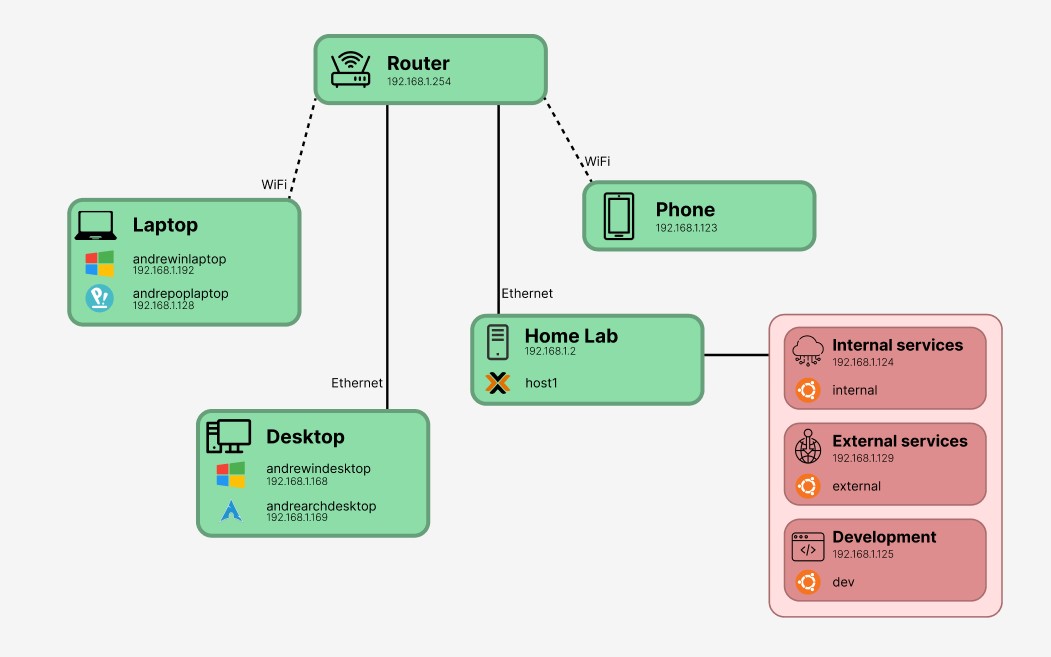
Configure the management network settings. Here my router is on 192.168.1.254, which I will be using as my gateway and DNS server. I set the IP address of my Proxmox server to 192.168.1.2 for easy reference. In the router web interface, I also assigned a static IP address of 192.168.1.2 to the Mac address of my desktop.
Hostname: host1.pve.local
IP address: 192.168.1.2
Gateway: 192.168.1.254
DNS server: 192.168.1.254
After installation is successful, you will be prompted to reboot.
Accessing Proxmox Web Interface
Once fully installed, we can go to the Proxmox web interface denoted by the IP address of the Proxmox server and run on port 8006. In my case, it would be at https://192.168.1.2:8006. The interface is shown below.
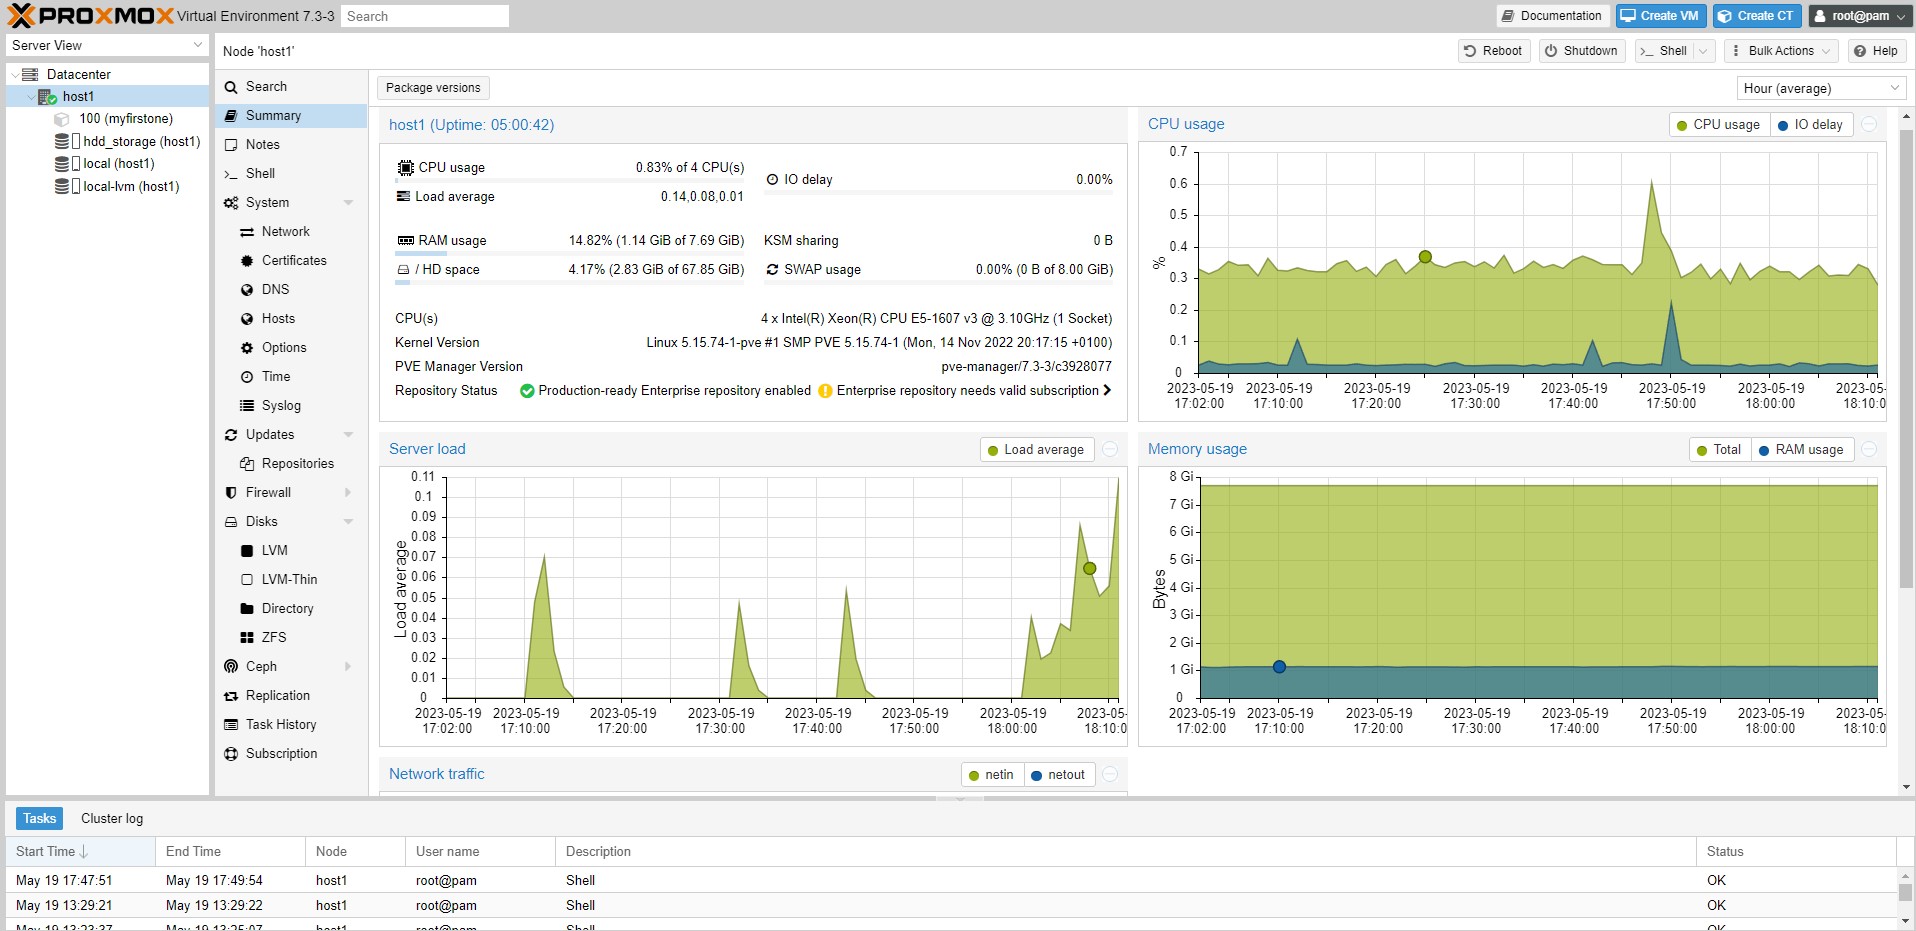
Currently, it only has one node, which represents a physical server that is currently running. We could install another Promox on another desktop to have another node, but one should be enough for a small home lab.
Creating Linux Containers
Now, we are ready to create our Linux Containers.
I want to use Linux Containers (LXC) over Kernel-based Virtual machines (KVM) because it provides lightweight virtualization and efficient resource utilization. KVM runs its own kernel as compared with LXC which uses the host operating system's kernel and shares them with other containers. This means that there is less overhead and fewer resources utilized.
The downside of LXC is that since our host operating system uses Linux, LXC can only run Linux-based operating systems such as Ubuntu or ArchLinux.
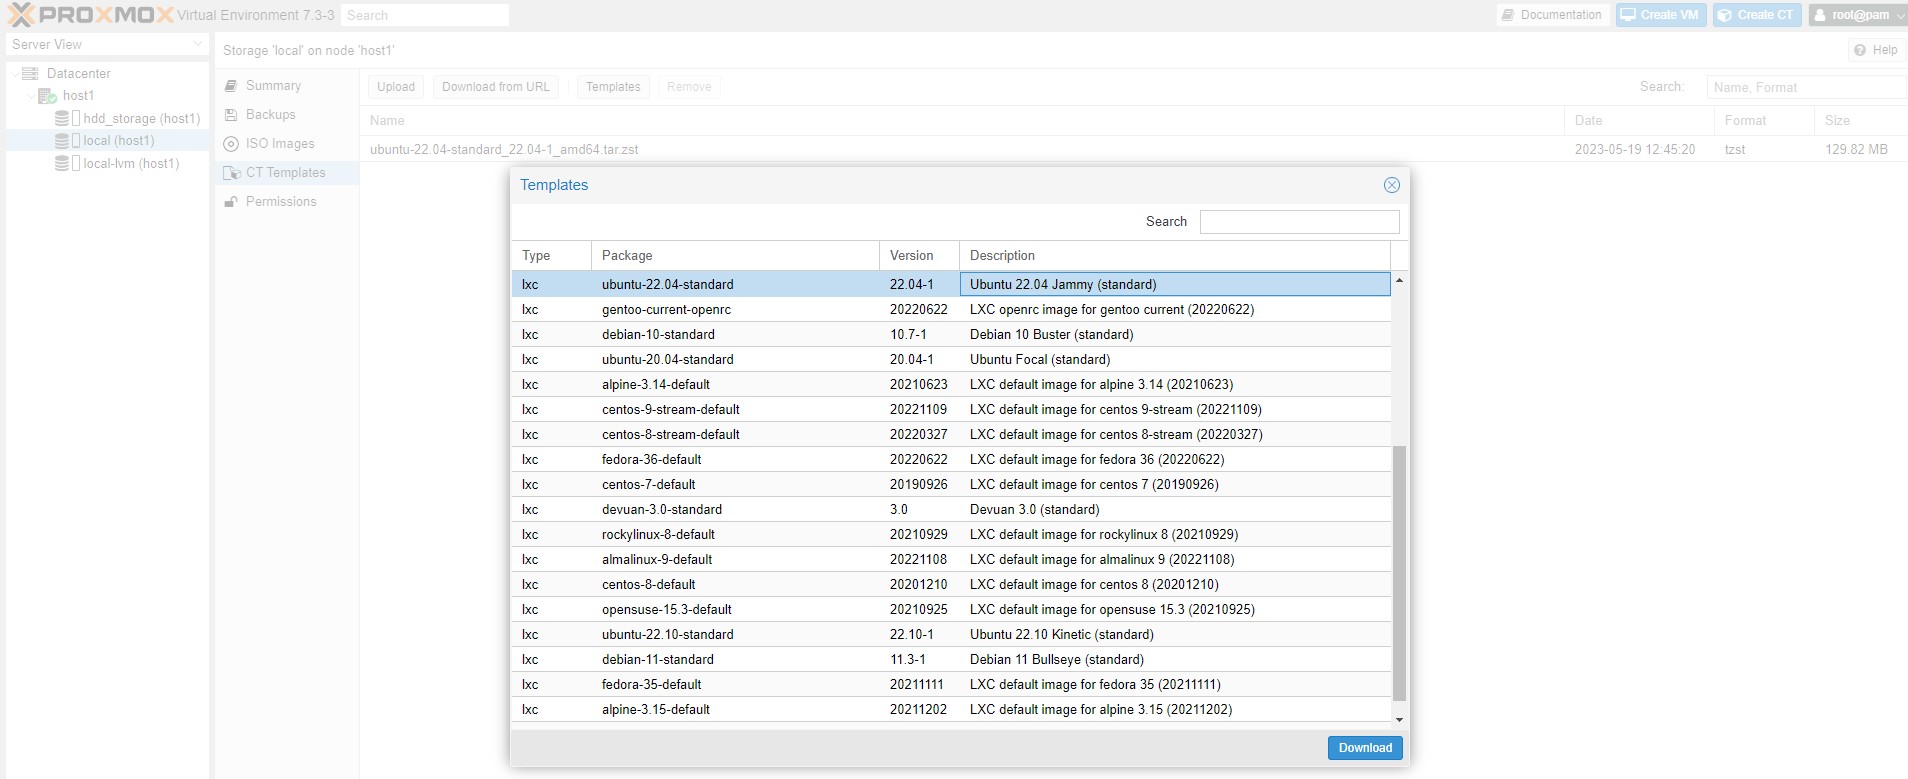
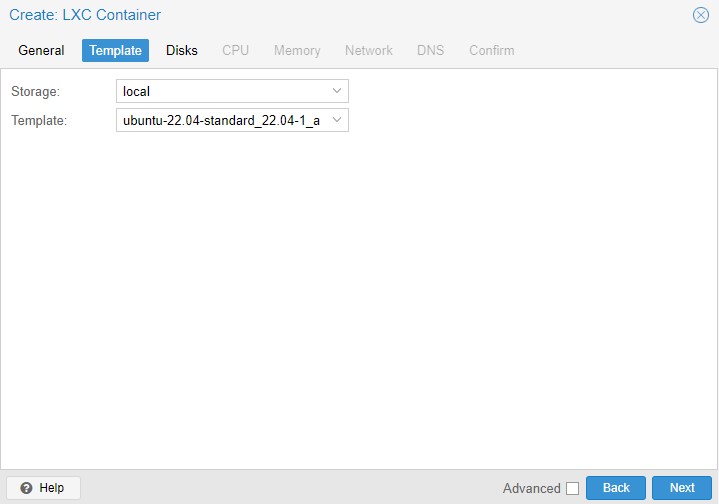
Let's get some LXC templates first. Under host1 > local > CT Templates > Templates, choose ubuntu-22.04-standard and then press download.
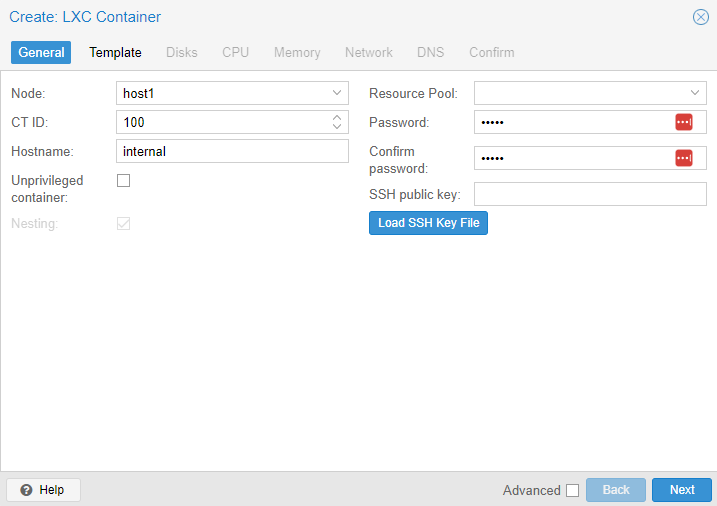
then click on Create CT on the top right-hand side of the interface. Set our Node as host1, our physical server and the hostname of our LXC as internal. I intend for this LXC to contain all my docker applications that are used internally in my home and not exposed to the public.
Next, select the template we had just downloaded earlier.
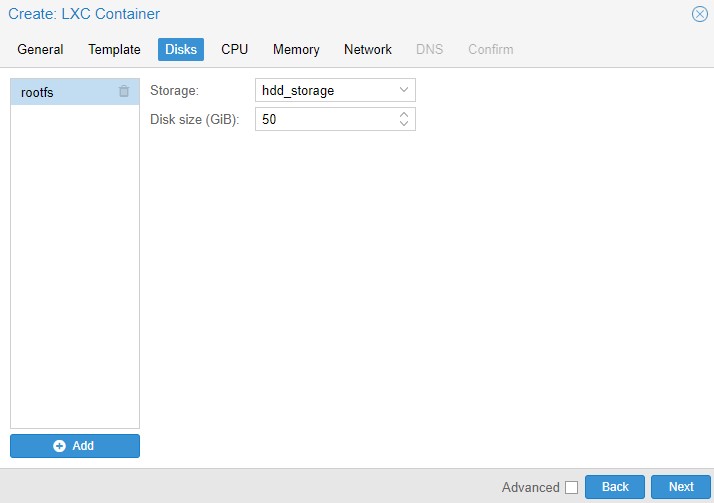
Set the amount of disk space we require.
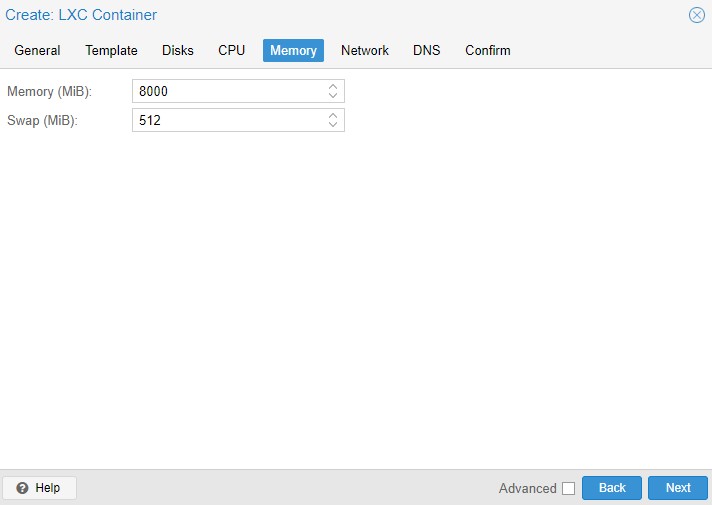
Followed by the size of the ram we require.
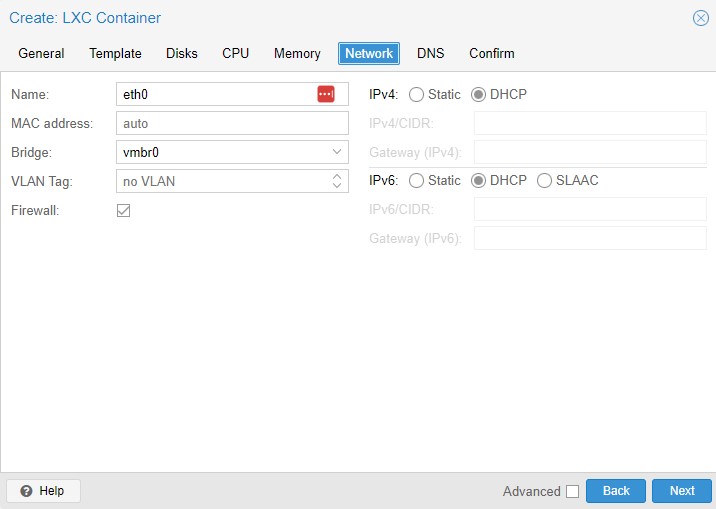
Lastly, we configure the IPv4 and IPv6 to use DHCP, to dynamically allocate IP addresses for our new LXC.
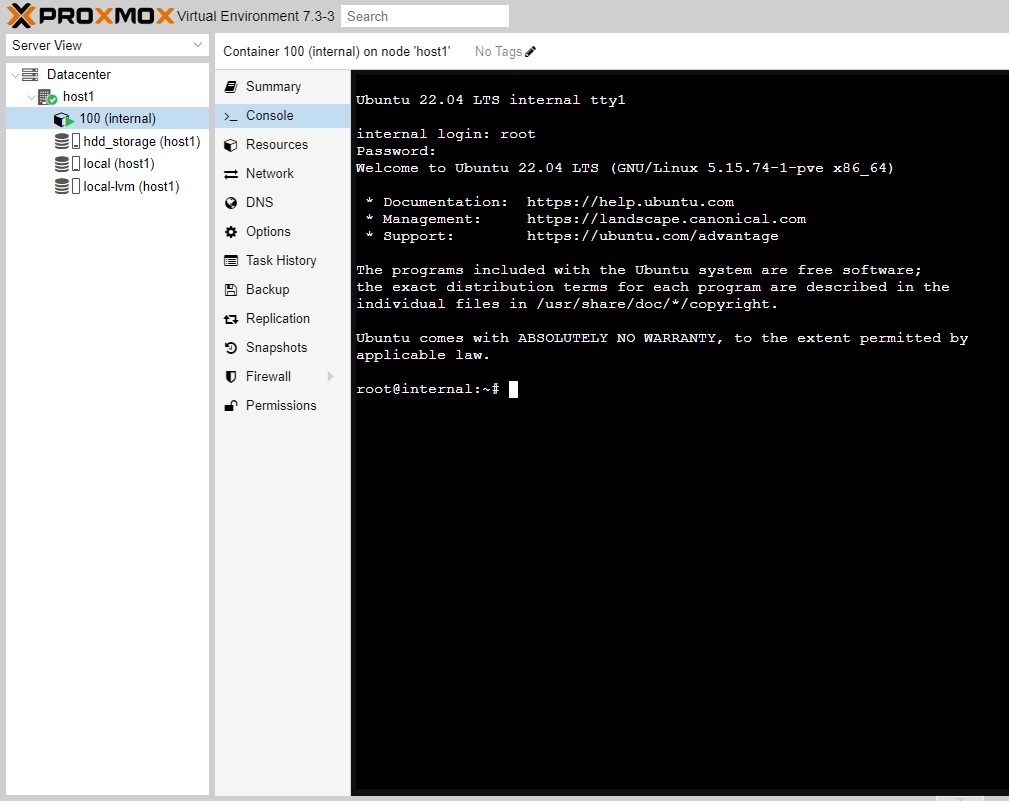
Confirm our selection and then reboot. Once our LXC has started up, we can view it through the console tab as shown below.
I will set up 2 more containers, one that is externally accessible for public use, named external, and the other for development use, named dev.
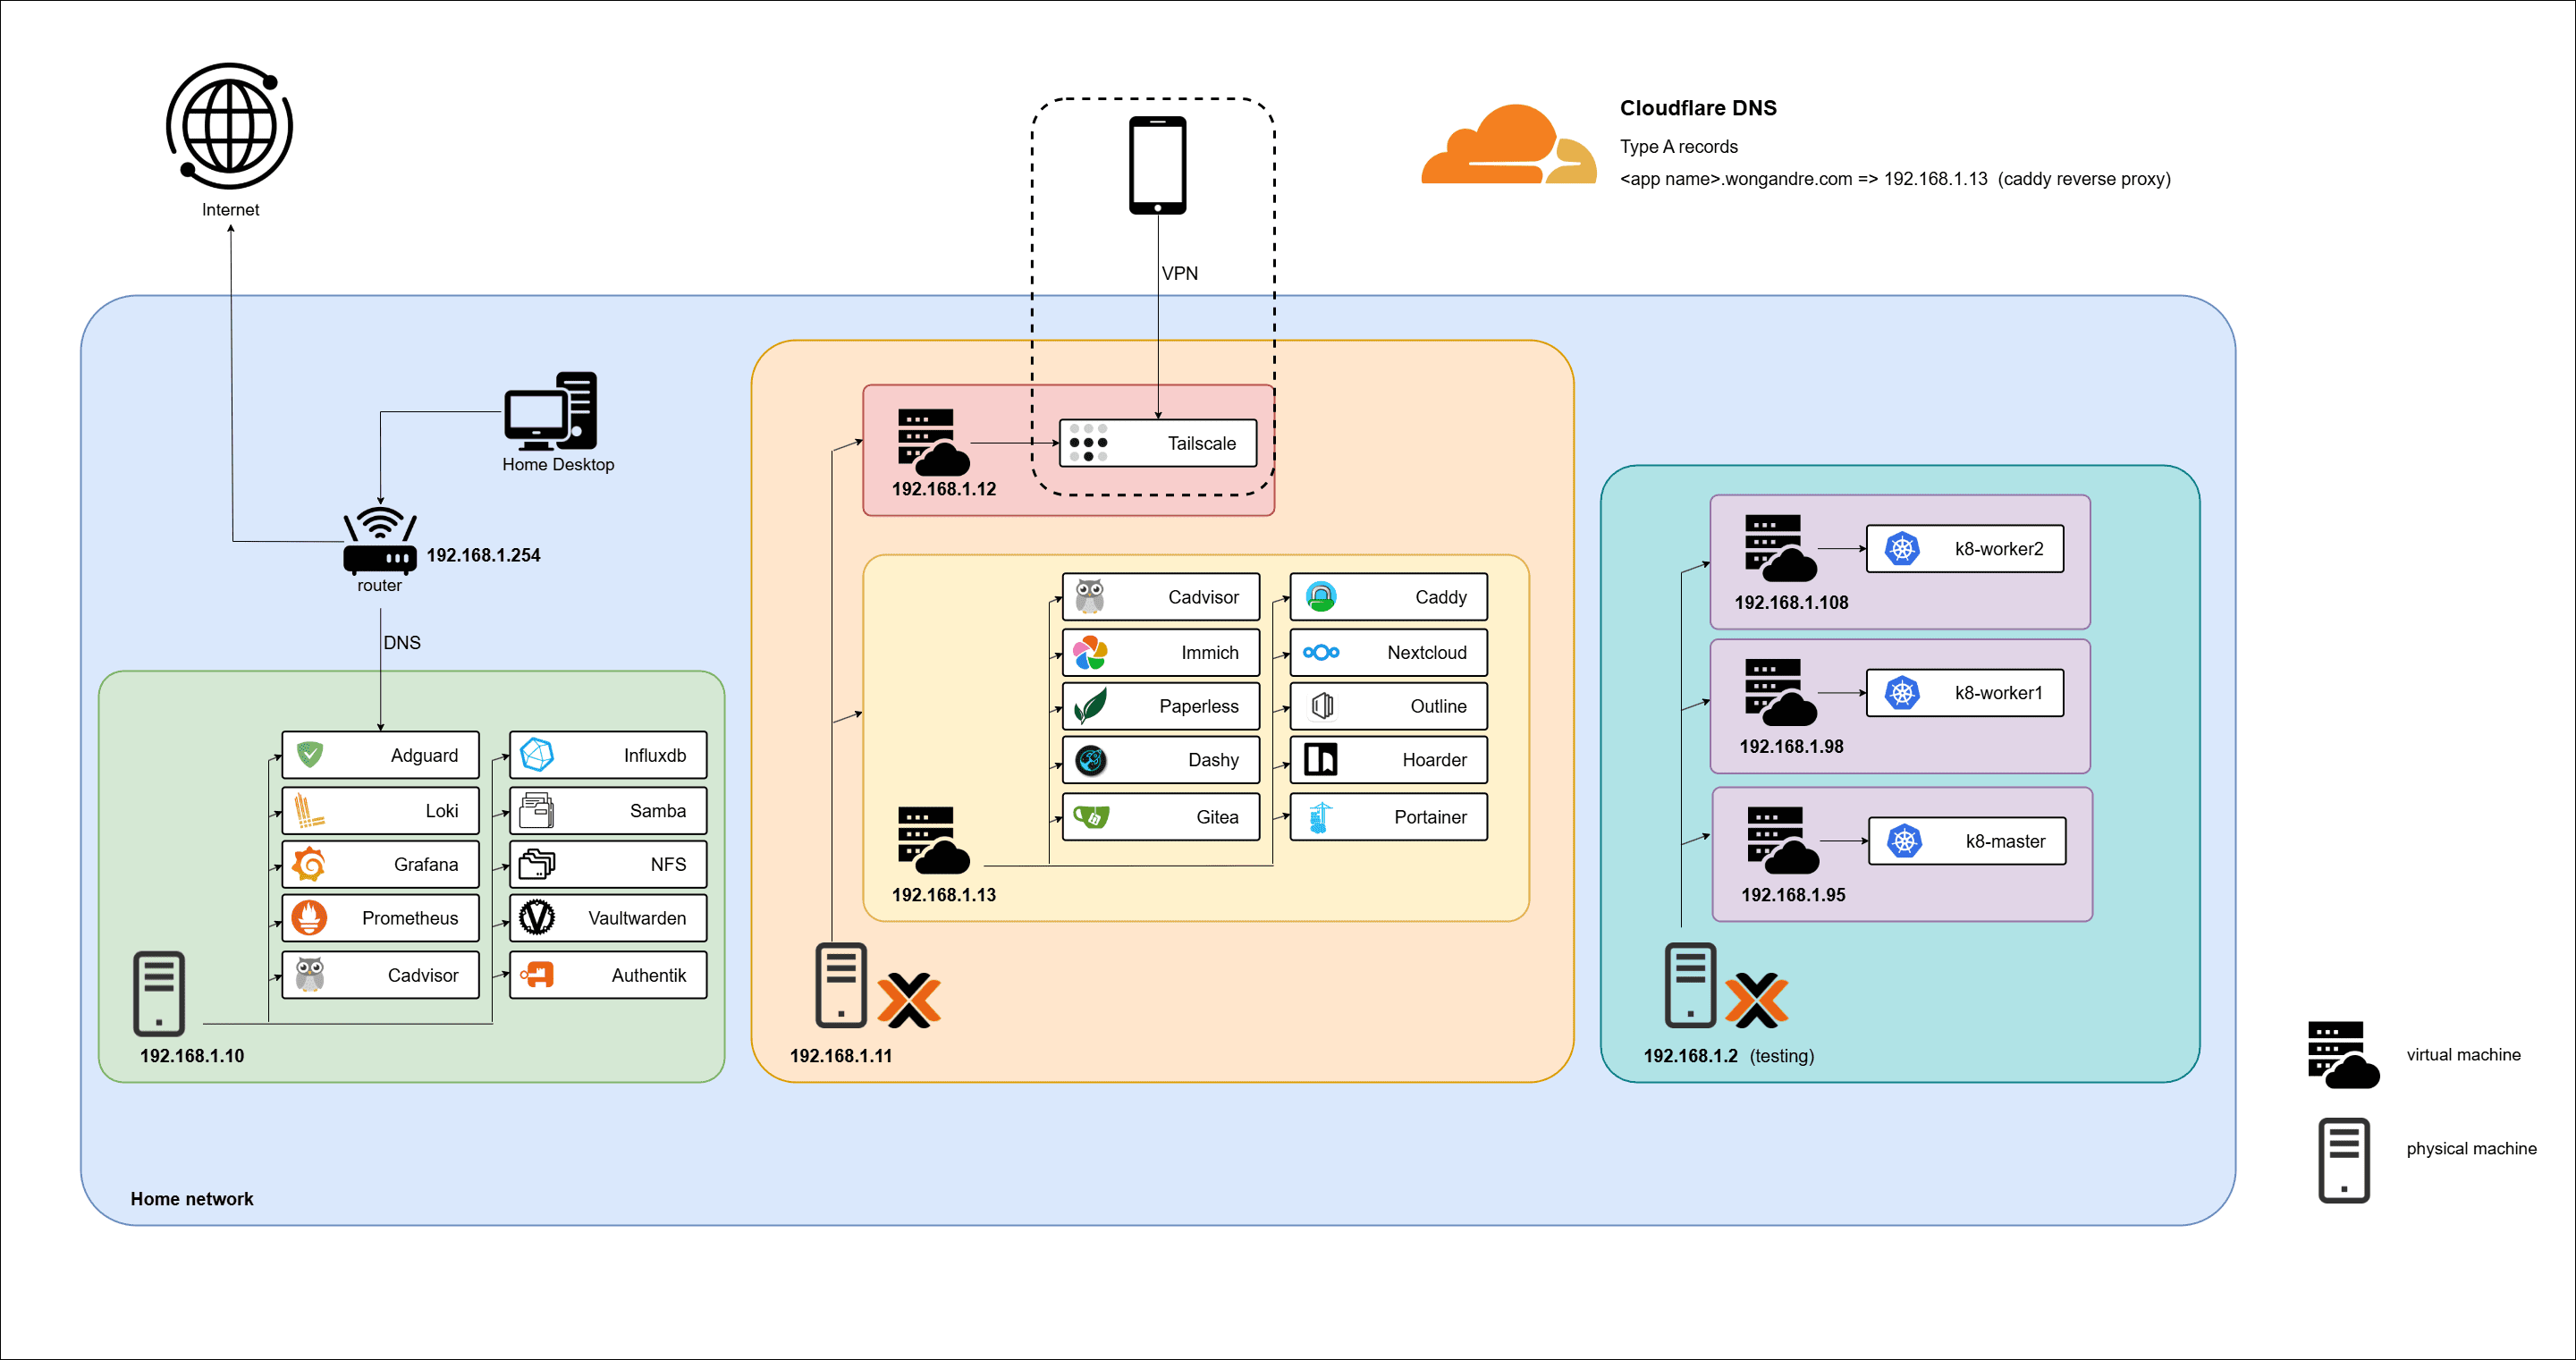
Architecture
Here is an overview of what I have created.
Conclusion
I have installed Proxmox on an old desktop and launched three Linux containers. In the future, I plan to install applications that I can use in my own home network and also to host some of my projects to the public.