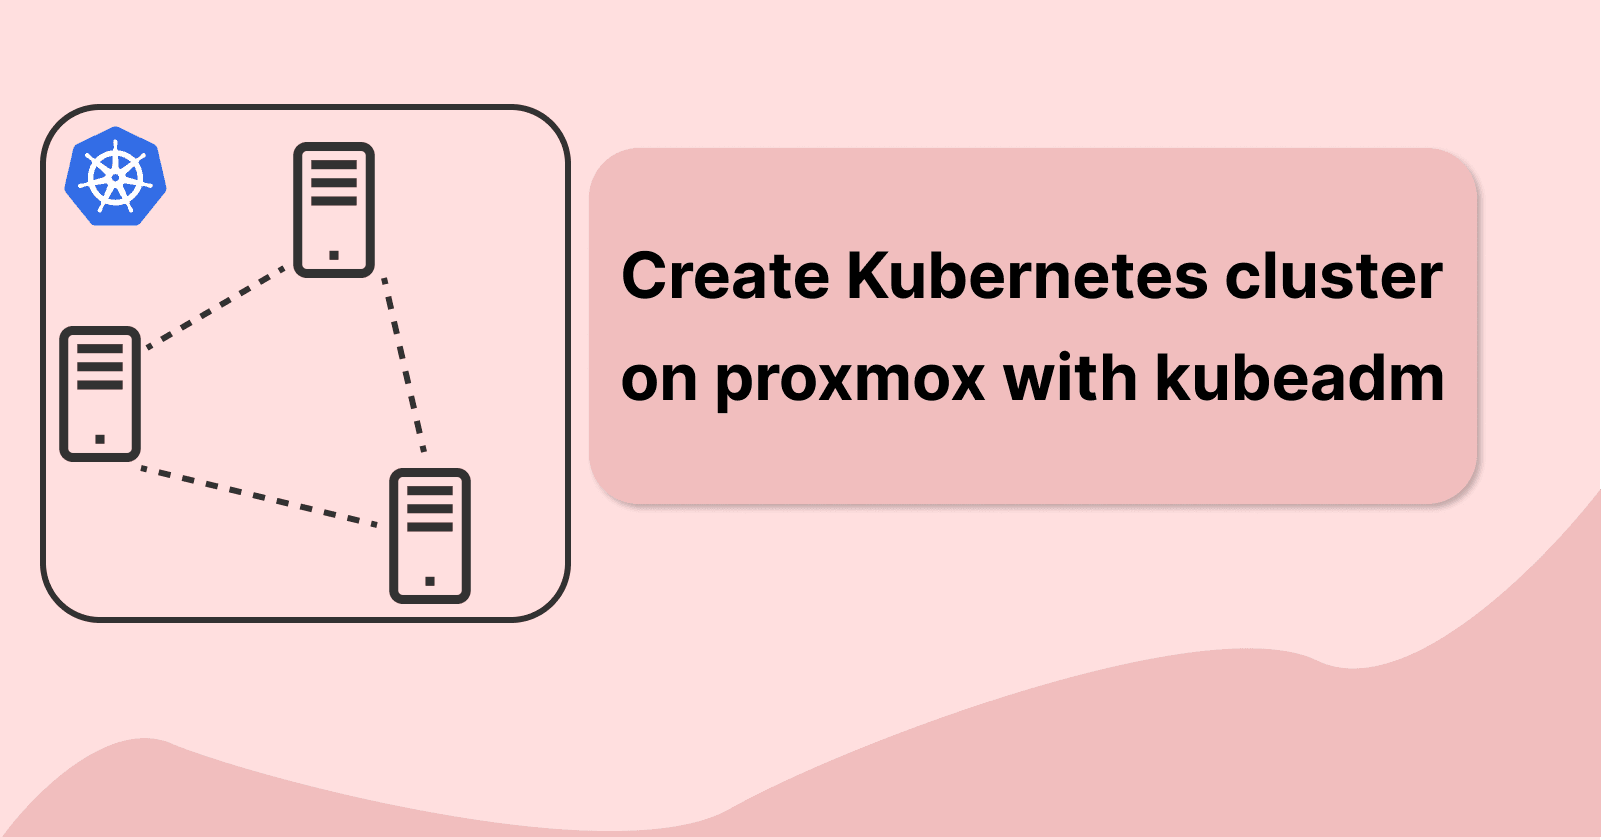
Installing kubernetes on proxmox VM
I am a software developer who is passionate about creating innovative and efficient solutions to complex problems. I also enjoy writing about my personal projects and sharing my knowledge with others. I am maintaining a blog to document my coding adventures, share tips and tricks for software development, and discuss interesting topics in computer science.
Using Proxmox, we can create virtual machines that we will be using to set up our Kubernetes cluster.
What is Kubernetes?
According to their official website, Kubernetes (K8s) is an open-source platform for automating deployment, scaling, and managing containerized applications. Some of K8's features are Automated rollout and rollbacks, availability, resource management, service discovery, and load balancing.
A Kubernetes cluster minimally has two nodes, one being the master and the other being the worker nodes. The master node is also known as the control plane which manages the state of the cluster through etcd, an API server for users to make API calls to query and modify the cluster, schedules newly created pods to worker nodes to run on, and also have various controller manager that watch and handle their specific tasks.
Setting up Kubernetes
We will be using kubeadm to set up our Kubernetes cluster consisting of one master and one worker node. This is a much simpler way to bootstrap our Linux virtual machine with Kubernetes. We will be using Ubuntu-22.04.3-live-server-amd64.iso which can be downloaded from here.
Let's create our first virtual machine and make this our master node. When creating our virtual machine, ensure we have minimally 2 virtual CPU cores and 2GB of RAM. The rest of the settings can be left as default. We will name this node k8-master.

Now start the virtual machine and then proceed with the Ubuntu server installation. We can just go for the defaults.
remove the swap from the server, edit the
/etc/fstaband comment out the swap, and then reboot the server. We can verify if the swap is disabled by runningswapon --showenable IP tables bridged traffic. we need to enable overlay and br_netfilter, as well as to enable bridged traffic to pass through the firewall rules for packet filtering
 echo -e "overlay\nbr_netfilter" | sudo tee /etc/modules-load.d/k8s.conf

 sudo modprobe overlay
 sudo modprobe br_netfilter

 echo -e "net.bridge.bridge-nf-call-iptables  = 1
 net.bridge.bridge-nf-call-ip6tables = 1
 net.ipv4.ip_forward                 = 1" | sudo tee /etc/sysctl.d/k8s.conf

 # refresh system configurations
 sudo sysctl --system
Now we can install our container runtime. Here we have some options to choose from, mainly CRI-O, containerd, or Docker Engine. In our setup, we will be using CRI-O. The documentation of how to install can be found here.
Set up environmental variables and then run the following as root
     OS="xUbuntu_22.04"
     VERSION="1.28"

     sudo -s
     echo "deb [signed-by=/usr/share/keyrings/libcontainers-archive-keyring.gpg] https://download.opensuse.org/repositories/devel:/kubic:/libcontainers:/stable/$OS/ /" > /etc/apt/sources.list.d/devel:kubic:libcontainers:stable.list
     echo "deb [signed-by=/usr/share/keyrings/libcontainers-crio-archive-keyring.gpg] https://download.opensuse.org/repositories/devel:/kubic:/libcontainers:/stable:/cri-o:/$VERSION/$OS/ /" > /etc/apt/sources.list.d/devel:kubic:libcontainers:stable:cri-o:$VERSION.list

     mkdir -p /usr/share/keyrings
     curl -L https://download.opensuse.org/repositories/devel:/kubic:/libcontainers:/stable/$OS/Release.key | gpg --dearmor -o /usr/share/keyrings/libcontainers-archive-keyring.gpg
     curl -L https://download.opensuse.org/repositories/devel:/kubic:/libcontainers:/stable:/cri-o:/$VERSION/$OS/Release.key | gpg --dearmor -o /usr/share/keyrings/libcontainers-crio-archive-keyring.gpg

     apt-get update
     apt-get install cri-o cri-o-runc -y

     # optional
     apt-get install install cri-tools -y

     # enable cri-o
     systemctl daemon-reload
     systemctl enable crio --now

     # verify cri-o running
     systemctl status crio
Install kubeadm, kublet, and kubectl
We are installing Kubernetes V1.28, documentations can be referred to here
Run the following commands in root:
 apt-get update
 apt-get install -y apt-transport-https ca-certificates curl gpg

 # version number here can be disregarded, they all use the same signing key
 curl -fsSL https://pkgs.k8s.io/core:/stable:/v1.28/deb/Release.key | sudo gpg --dearmor -o /etc/apt/keyrings/kubernetes-apt-keyring.gpg

 # add packages for kubernetes 1.28
 echo 'deb [signed-by=/etc/apt/keyrings/kubernetes-apt-keyring.gpg] https://pkgs.k8s.io/core:/stable:/v1.28/deb/ /' | sudo tee /etc/apt/sources.list.d/kubernetes.list

 apt-get update
 apt-get install -y kubelet kubeadm kubectl

 # pin the package version, do not allow them to auto update
 apt-mark hold kubelet kubeadm kubectl
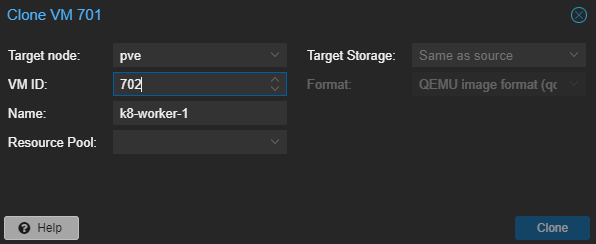
Now we can do a clone here to make a copy of our virtual machine so we can replicate it later for our worker nodes.
Bootstrap kubeadm
set the following environment variables, ensure that the POD_CIDR does not conflict with the host network's CIDR
Pod CIDR addresses are the range of network addresses that Kubernetes assigns to pods for communication with each other
 IPADDR="192.168.1.95"
 # nodename will be k8-master
 NODENAME=$(hostname -s)
 POD_CIDR="10.244.0.0/16"

 kubeadm init --apiserver-advertise-address=$IPADDR  --apiserver-cert-extra-sans=$IPADDR  --pod-network-cidr=$POD_CIDR --node-name $NODENAME
once done we can see the output as follows:
 Your Kubernetes control-plane has initialized successfully!

 To start using your cluster, you need to run the following as a regular user:

   mkdir -p $HOME/.kube
   sudo cp -i /etc/kubernetes/admin.conf $HOME/.kube/config
   sudo chown $(id -u):$(id -g) $HOME/.kube/config

 Alternatively, if you are the root user, you can run:

   export KUBECONFIG=/etc/kubernetes/admin.conf

 You should now deploy a pod network to the cluster.
 Run "kubectl apply -f [podnetwork].yaml" with one of the options listed at:
   https://kubernetes.io/docs/concepts/cluster-administration/addons/

 Then you can join any number of worker nodes by running the following on each as root:

 kubeadm join 192.168.1.95:6443 --token rt9hbl.rm42uzvezo1h76ms \
         --discovery-token-ca-cert-hash sha256:11bfcff27dff2930b0f6a236d10105d721239334aa65c738e4a411b7e779ea38
as you can see we have a few things to do after installation:
if running as a regular user, run the following:
  mkdir -p $HOME/.kube
  sudo cp -i /etc/kubernetes/adm2in.conf $HOME/.kube/config
  sudo chown $(id -u):$(id -g) $HOME/.kube/config
this allows us to run kubectl commands from the host with this config file. We can copy this config into our personal PC if we do not want to SSH into the control plane to apply changes.
on the other virtual machine that we have cloned, we can join the master node as follows:
  # update worker hostname to k8-worker-1
  sudo hostnamectl set-hostname k8-worker-1
  sudo reboot

  # join network
  kubeadm join 192.168.1.95:6443 --token rt9hbl.rm42uzvezo1h76ms \
          --discovery-token-ca-cert-hash sha256:11bfcff27dff2930b0f6a236d10105d721239334aa65c738e4a411b7e779ea38
Note that you should use your token as shown in your terminal instead of the token shown here. this is an example of what it may look like.
This is what it should look like after joining successfully
  This node has joined the cluster:
  * Certificate signing request was sent to apiserver and a response was received.
  * The Kubelet was informed of the new secure connection details.

  Run 'kubectl get nodes' on the control-plane to see this node join the cluster.
Here are some kubectl commands to verify the cluster
 kubectl get pod -n kube-system
 kubectl get nodes
 kubctl cluster-info
 kubectl get --raw='/readyz?verbose'
Installing Calico Network Plugin
The kubeadm installation also mentions deploying a pod network to the cluster. We will be using Calico to manage our pods' networking and policy.
documentation on Calico can be found here
# install Tigera Calico operator and CRDs
kubectl create -f https://raw.githubusercontent.com/projectcalico/calico/v3.27.0/manifests/tigera-operator.yaml
# install Calico and CRDs
curl https://raw.githubusercontent.com/projectcalico/calico/v3.27.0/manifests/custom-resources.yaml > calico.yaml
# update ipPools.cidr: 192.168.0.0/16 to your defined $POD_CIDR above
kubectl create -f calico.yaml

# ensure the pods are running
watch kubectl get pods -n calico-system
kubectl get nodes -o wide
The output of kubectl get pods -A should be as shown below
Every 2.0s: kubectl get pods -A                                                      k8-master: Sun Feb 11 07:06:16 2024

NAMESPACE          NAME                                      READY   STATUS    RESTARTS   AGE
calico-apiserver   calico-apiserver-567f687f88-dkhkr         1/1     Running   0          2m8s
calico-apiserver   calico-apiserver-567f687f88-sftwl         1/1     Running   0          2m8s
calico-system      calico-kube-controllers-6c5c88c78-j9n57   1/1     Running   0          3m39s
calico-system      calico-node-49pjm                         1/1     Running   0          3m39s
calico-system      calico-node-xdkgv                         1/1     Running   0          3m39s
calico-system      calico-typha-6656cb9b9b-dsgnc             1/1     Running   0          3m39s
calico-system      csi-node-driver-4xlkj                     2/2     Running   0          3m39s
calico-system      csi-node-driver-c5s9d                     2/2     Running   0          3m39s
kube-system        coredns-5dd5756b68-bg8jz                  1/1     Running   0          56m
kube-system        coredns-5dd5756b68-ghrtb                  1/1     Running   0          56m
kube-system        etcd-k8-master                            1/1     Running   0          56m
kube-system        kube-apiserver-k8-master                  1/1     Running   0          57m
kube-system        kube-controller-manager-k8-master         1/1     Running   0          56m
kube-system        kube-proxy-jhdds                          1/1     Running   0          56m
kube-system        kube-proxy-sjmrl                          1/1     Running   0          36m
kube-system        kube-scheduler-k8-master                  1/1     Running   0          56m
tigera-operator    tigera-operator-55585899bf-ktqsx          1/1     Running   0          3m50s
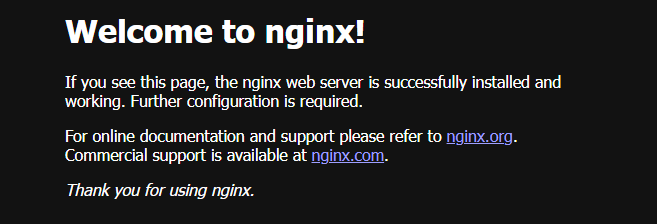
Simple Deployment
Now that our Kubernetes cluster is set up, let's run a simple Nginx deployment to verify our cluster is working
First, create a nginx-deployment.yaml file:
apiVersion: apps/v1
kind: Deployment
metadata:
  name: nginx-deployment
spec:
  selector:
    matchLabels:
      app: nginx
  replicas: 1
  template:
    metadata:
      labels:
        app: nginx
    spec:
      containers:
        - name: nginx
          image: nginx:latest
          ports:
            - containerPort: 80
---
apiVersion: v1
kind: Service
metadata:
  name: nginx-service
spec:
  selector:
    app: nginx
  type: NodePort
  ports:
    - port: 80
      targetPort: 80
      nodePort: 31000
This will create one Nginx deployment and also its corresponding service, which we will expose externally via nodePort on port 31000
Run kubectl apply -f nginx-deployment.yaml to apply our changes. If everything goes well, we should be able to see our default Nginx page at http://<node IP>:31000
Resources referenced:
https://kubernetes.io/docs/setup/production-environment/tools/kubeadm/install-kubeadm/
https://kubernetes.io/docs/setup/production-environment/tools/kubeadm/create-cluster-kubeadm/
https://github.com/cri-o/cri-o/blob/main/install.md#install-packaged-versions-of-cri-o
https://docs.tigera.io/calico/latest/getting-started/kubernetes/quickstart